
![]() This is the start
of an experiment to build a cheap copy of a Euro-reef skimmer. I
won't pretend to make it as good, but I'll try to approach the
same results as much as possible. As I can't find any clear PVC
or acrylic tubes in Dubai, I'll do the reaction chamber using
acrylic sheets, thus making it square. Progress will first be
posted here, then, if I get a good product with good results,
I'll create a dedicated section with detailed plans, measurements
and instructions. I may be able to get acrylic tube of a correct
size to build a collection cup, this will come later.
This is the start
of an experiment to build a cheap copy of a Euro-reef skimmer. I
won't pretend to make it as good, but I'll try to approach the
same results as much as possible. As I can't find any clear PVC
or acrylic tubes in Dubai, I'll do the reaction chamber using
acrylic sheets, thus making it square. Progress will first be
posted here, then, if I get a good product with good results,
I'll create a dedicated section with detailed plans, measurements
and instructions. I may be able to get acrylic tube of a correct
size to build a collection cup, this will come later.
I'm happy
with the skimmer I'm using, but I think it still has a few
problems, as related by a good number of emails on the Aquamer
mailing list: it has to be cleaned too often, skimmate may be too
clear (tea color), a bit irregular, too hard on plankton,
centrifugial effect may be nocive, limited by the Eheim venturi
to produce correctly sized bubbles, high power consuption of the
driving pump...
I repeat, don't get me wrong, the skimmer I'm presently using is
OK, it's easy and cheap to build and results on the aquarium are
clearly good. I just want to experiment on a new concept of cheap
and easy DIY for the masses. But there I may be pretty
presumtuous... ;o)
Throughout
the page, click on the thumbnail to view the full-sized picture.![]()
March 10, 2000
 |
 |
 |
 |
 |
 |
 |
 |
 |
January 28, 2000
I got all the parts and I finally glued it! Here are some pics of the proceedings.
 |
 |
 |
 |
 |
 |
I hope you noticed the quality of my weights!
More to come in the coming week. (I hope)
April 30th, 1999
I'm stuck with my skimmer by lack of correctly sized PVC. I'm going to get it from France.
April 23rd, 1999
After good results during the bathtub tests in fresh water, I decided to do some real-life saltwater test in the main aquarium. It was great ! I filled up more than 200-liters with very fine bubbles (less than 1-mm). I really can adjust the air/water ration. It is not sensible to immersion depth (pressure), at least not enough to worry me.
Gaelle was good enough to hold the pump while I took some pictures. I want to remind you that the test was done is the display tank. Do you see the reef behind the bubbles ?


Now a few close-ups of the shredder wheel:


April 16th, 1999

Dispergator (needle-wheel), 1999 model for a Eheim 1250. I used a
Hagen Bio-sphere that I "slightly" modified and glued
using a 2-components epoxy glue (Araldite).

This is the Eheim 1250 pump. I screwed in a PVC piece, which hold
an air line in place. This tube goes as far as possible and is
parallel to the water flow. I did a few "bathroom tests",
i.e. in a full bathtub. The bubbles are looking extremely fine,
even in fresh water. I can adust the mix from 100% water to 100%
air (the pump just doesn't produce any flow), hence the valve.
The system is not visibly sensible to pressure (immersion depth
of the pump).


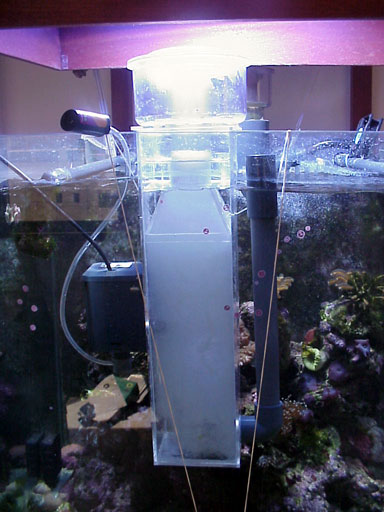
On-going project... Left is the reaction chamber waiting to be
glued (help by tape at the time being). The bottom and top are
still not cut to the right dimension. Right is what I will use as
foam concentrator. As I will use a Tunze 230 cup for foam
collecting, I will have to make it round at the top.

The first "needle-wheel" or dispergator that I built
for a skimmer, back in 1995. It fitted a Eheim 1060 pump.
Last modification : March 10, 2000